
Using Camtasia: Use Markers in Camtasia Projects
Note: Most of the links have been removed from this page.
A video of this tutorial is available: link.
Video Transcript
To set markers in a video project:
- Use one of your existing Camtasis projects, or start a new one. Prefer a project with a timeline of least 10n minutes or so.
- Find an area within your video to delete.
- Click Edit > Markers > Add a timeline marker:

- Right-click on the marker, and select Rename:
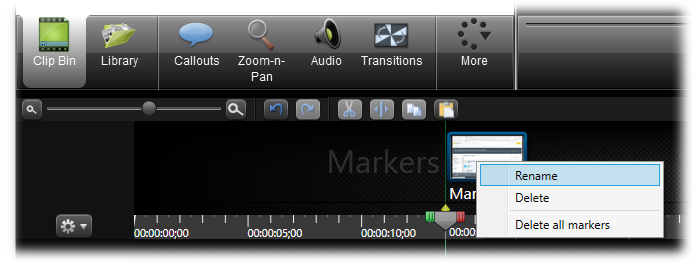 Rename your first marker something like spot2. Move that marker to the end of the segment you want to delete.
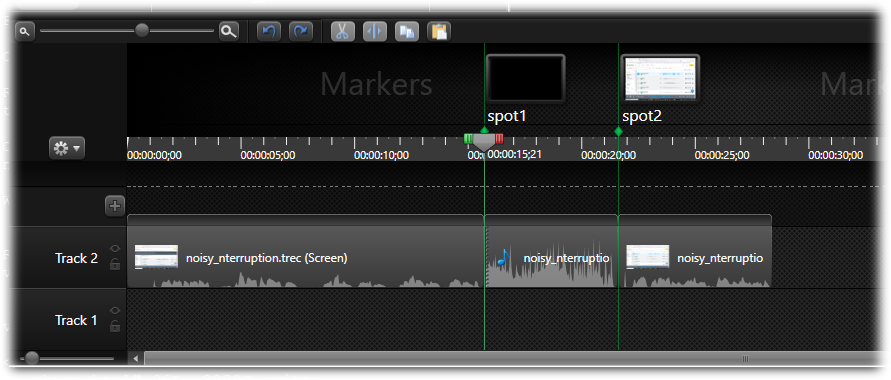
 - Create another marker named something like spot1, making sure it is at the beginning of the segment you want to delete. Your Camtasia should look like this:
- With the playhead on spot1, hold down the Shift key and press the right angle bracket. This highlights to segment you want to delete.
- Right-click on top of the selected area and select Copy, Cut, or Deleter. If you select Cut or Copy, move to another area, and press Paste.
Complete This Unit
To reassure your instructor that you have gotten through this unit successfully:
- Take a screen shot of the markers displaying in your Camtasia project.
- E-mail screen shot to your instructor at admin@mcmassociates.io (click this link).
Return
Return to your bookmarked course main page.
Related Information
Information and programs provided by admin@mcmassociates.io.