
FrameMaker Variables & Conditional Text
A video recording of this tutorial is available: video
Create or more FrameMaker documents in which you do the following steps.
Variables
When documenting new products, variable text is essential. The names of products often change several times and are often not established until weeks before a release. Variables allow you to change product names quickly and consistenly across several documents.
FrameMaker provides a default set of system variables, such as dates and file names, and the ability to create user variables. This section discusses user variables.
Creating a User Variable
The best way to manage user variables is to create them within a template for your documentation library. Each document within your library should be based on this template; for more information about templates, see Templates.
In this exercise, you create a user variable within a template.
- Open a new document, and save it as a template:
- Open FrameMaker, and select File > New > Document.
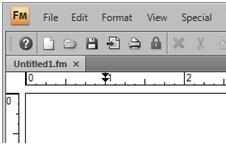
- Click Portrait. A new document, named Untitled1.fm, will automatically appear in your document window. The new document will appear similar to the following:
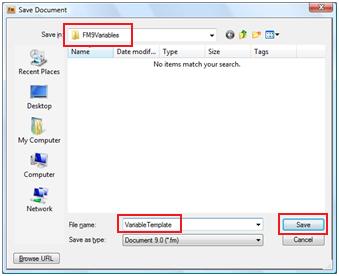
- Select File > Save. For this exercise, the file has been saved in a folder named FM9 Variables. You may wish to save your document in a similar manner so it can be found quickly for reference.
- In the File name box, type VariableTemplate for the template name, and click Save.
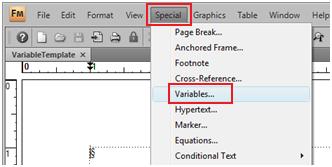
- Select Special > Variables. The drop-down menu will appear as follows:
The Variables dialog box will appear as follows:
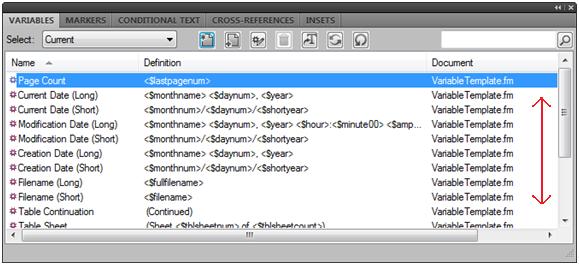
You can use the scroll bar to view the existing variables; these variables are known as system variables.

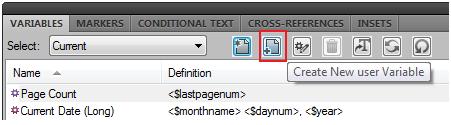
Note: System variables can be modified, but they cannot be deleted. Also, you cannot use system variable building blocks in a user variable definition. - In the Variables dialog box, click Create New user Variable. The screen should appear as follows:
The ADD/EDIT Variable dialog box appears as follows:
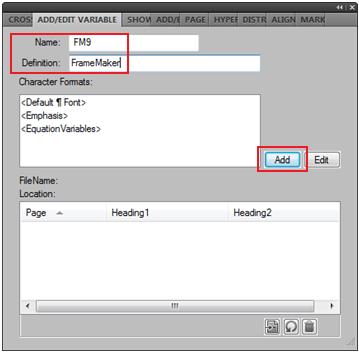
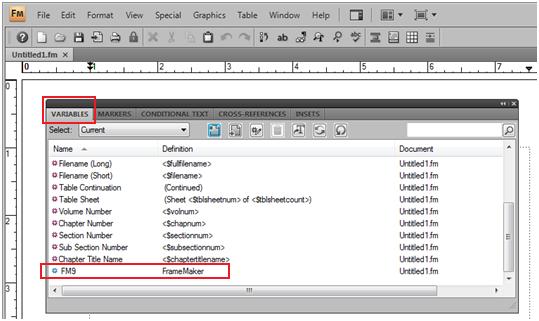
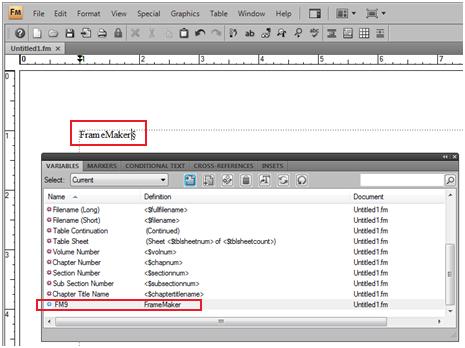
- In the Name box, type FM9.
- In the Definition box, type FrameMaker.
Note: Variable names are case-sensitive; FM is not the same as fm. - Click Add to store this new variable.
- Close each dialog box.
- Save and close your template.
The Save Document dialog box should appear similar to the following:
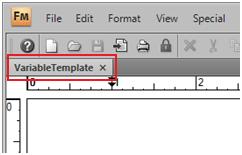
The file name is shown in the upper left-hand corner of your document window as follows:
Inserting a User Variable
You can now create a new document from your template and insert the variable:
- Select File > New > Document.
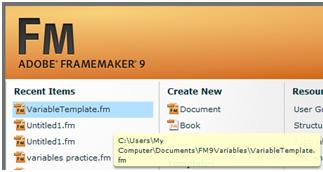
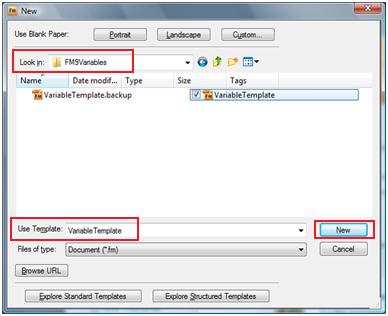
- Locate the Look in: field for the appropriate folder. Find and select the template that you just created
(VariableTemplate.fm). For a short-cut, visit the FrameMaker 9 dashboard and click on the first item in the Recent Items list. The first file listed should be the newly created file named VariableTemplate.fm. The dashboard will appear as follows:
The file name is located in the Use Template box and will appear as follows:
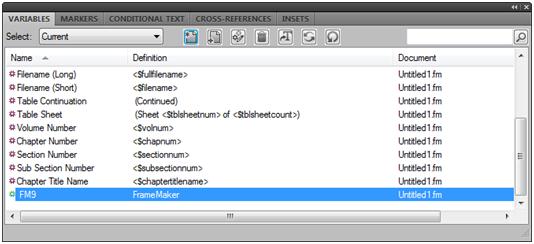
- Click New. The Variables dialog box should automatically open and your newly created variable will appear as follows:
- If the Variables dialog box does not automatically appear, select Special > Variables. Look for the new variable that was created in Step 3.
- Within the Variables dialog box, highlight the variable that you just created. You may need to use the scroll-down function on the right-hand side of the Variables dialog box to locate the new variable. The Variables dialog box will appear as follows:
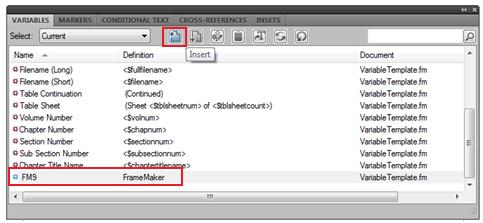
- Click the Insert icon to place the variable in to your new document. The Variables dialog box will appear as follows:
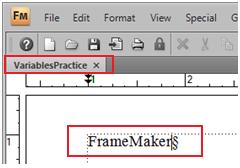
The variable text, FrameMaker, now appears in the document window as follows:

Tip: You can also press Ctrl + 0 (zero) to insert a variable. When you press Ctrl + 0, the bottom left side of the FrameMaker status bar becomes highlighted. Press the first letter of the variable to insert. When the variable appears in the bottom left corner, press Enter.
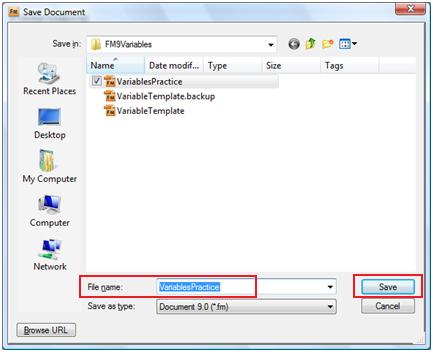
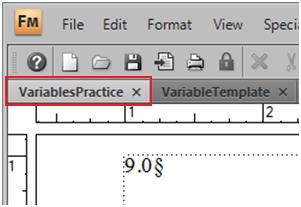
- Select File > Save.
- In the File Name box, type VariablesPractice for the file name, and click
Save. The Save Document dialog box will appear as follows:
- Close the Variables dialog box. The document window will appear as follows:
Changing a Variable Definition
To change a variable definition:
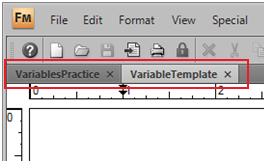
- Open your template (VariablesTemplate.fm). The document window will have two files displayed and will appear as follows:
- Select Special > Variable.
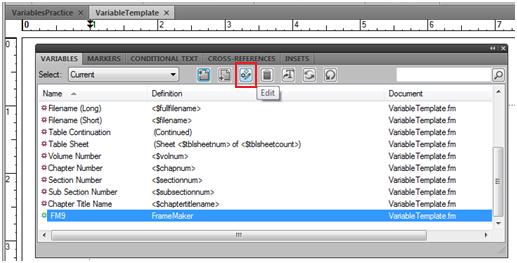
- In the Variables dialog box, select the FM9 variable, and click Edit. The Variables dialog box will appear as follows:
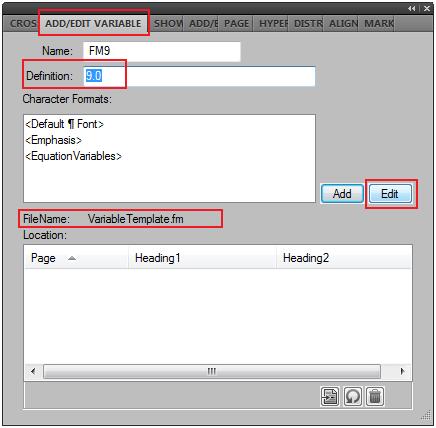
- In the Definition box, type 9.0, and click Edit. The dialog box will appear as follows:
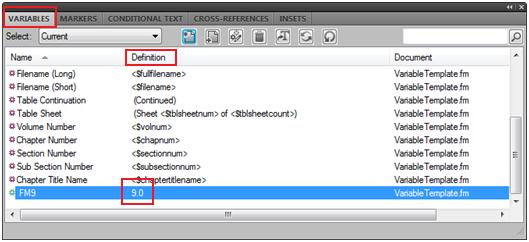
- Close the Add/Edit Variable dialog box. Notice that the definition of the variable has changed from FrameMaker to 9.0, and appears as follows:
- Click Save to save the template. Do not close the file VariableTemplate.fm.
Importing Variable Definitions
Once you change a variable definition, you must import it into other documents
in your library.
To import variable definitions:
- The file VariablesPractice.fm should be displayed in your document window. If it is not displayed, select Window > VariablesPractice.fm to view your document.
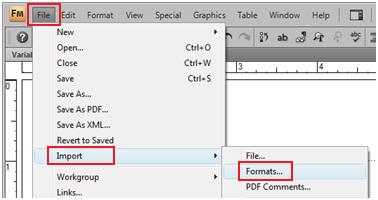
- Select File > Import > Formats. The drop-down menu will appear as follows:
The Import Formats dialog box will appear as follows:
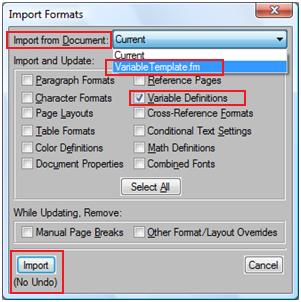
- From the Import from Document pull-down menu, select VariableTemplate.fm.
-
In the Import and Update area, click Deselect All.
- Select the Variable Definitions check box, and click Import.
The modified variable is updated within your document. To verify, open the Variables dialog box, and display the variable. Note: If you receive a message that states that these changes cannot be undone, click OK.
Tip: You can import individual elements by selecting the appropriate check box within the Import and Update: area, and clicking Import.
Your document window will appear as follows:
Conditional Text
Conditional text enables you to support two or more versions of a document using one set of files. For example, if you create a document that supports two versions of the same product, you can apply condition tags to the text that differs between the products. When you release the document, you show or hide the text based on the condition tags.
Condition Tags
This procedure describes how to create your own conditional tags and edit existing tags.
|
Note: If you are working on a book that consists of several files, you should create condition tags in a template and then import them into each book file. |
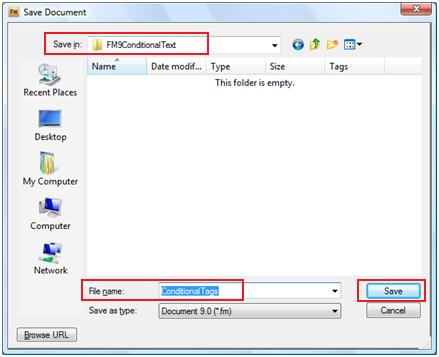
- Open a new document, and select File > New > Document > Portrait.
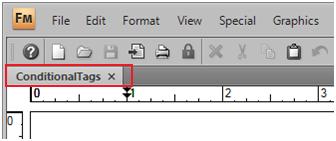
- The new file will be named Untitled1.fm. Click File > Save As. In the File Name box, type ConditionalTags, and click Save. The Save Document dialog box should appear as follows:
The document window will now appear as follows:
- Select Special > Conditional Text > Conditional Text. The drop-down menu will appear as follows:
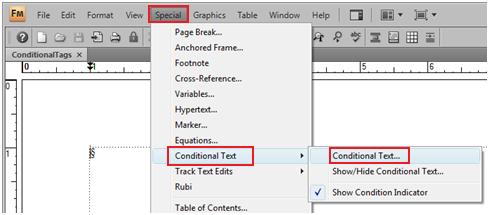
The Conditional Text dialog box appears as follows:
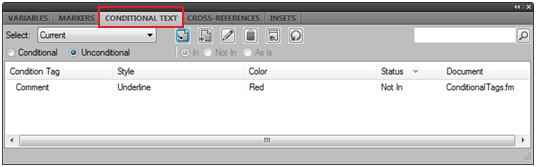
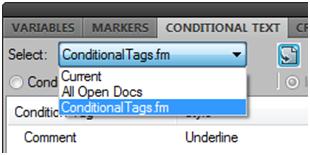
- Select the file named ConditionalTags.fm from the drop-down menu. The Conditional Text dialog box will appear as follows:
- In the Conditional Text dialog box, click Edit.
The Add/Edit Condition Tag dialog box appears as follows:
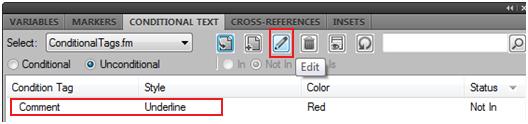
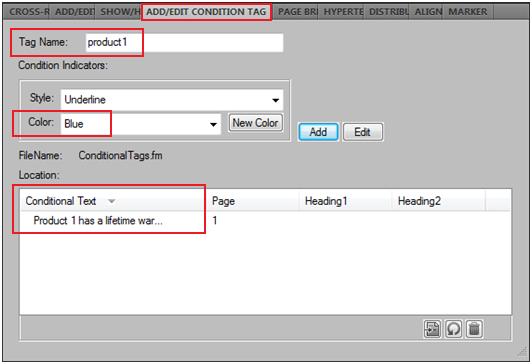
- Highlight the condition tag named Comment. This will be the condition tag that you will edit in this exercise.
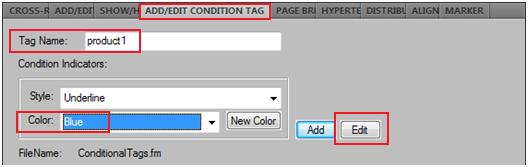
- In the Tag Name box, type product1.
- From the Color pull-down menu, select Blue, and click Edit. The Add/Edit Condition tag dialog box will appear as follows:
The Conditional Text dialog box will show the new condition tag as follows:

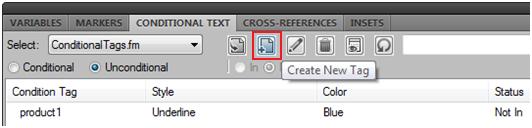
- In the Conditional Text dialog box, click Create New Tag. The dialog box will appear as follows:
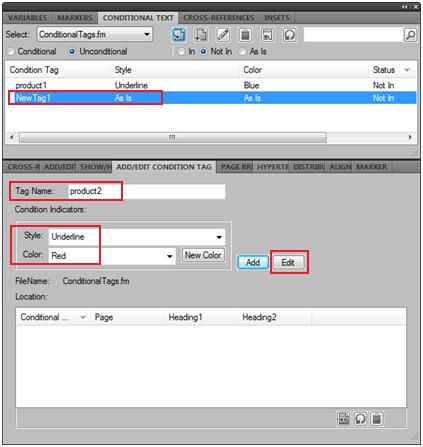
- In the Tag Name box, type product2. For Style, choose underline and for color, choose red. Click Edit. The dialog boxes will appear as follows:
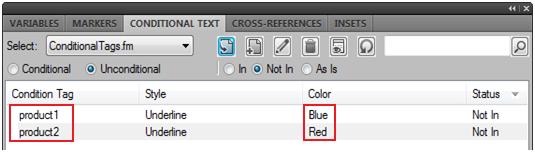
The Condition Text dialog box will now show two condition tags and will appear as follows:
- Close the Conditional Text dialog box and save the file named ConditionalTags.fm.
Applying Condition Tags
After you create the condition tags, you must apply them to the text:
- Type the following text into your document (or create two lines of text
on your own):
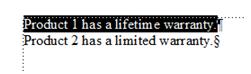
- Select the first line of text.
- Select Special > Conditional Text > Conditional Text.
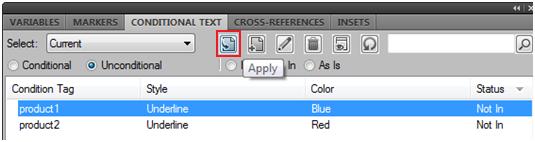
- In the Conditional Text dialog box, select product1.
- Click Apply and check the In radio button. The Condition Text dialog box will appear as follows:
Your settings should look similar to the following:

- Click Apply. The Add/Edit Condition Tag dialog box should look similar to the following:
- Repeat the previous steps to apply the product2 condition tag to the second line of text.
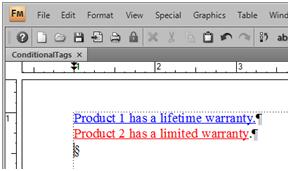
After the condition tags are applied to the text, your document window should appear similar to the following:
Showing and Hiding Conditional Text
After you apply the condition tags, you can show or hide the text:
- In the Conditional Text dialog box, click Show/Hide Conditional Text.
The Show/Hide Conditional Text dialog box appears and will look similar to the following:
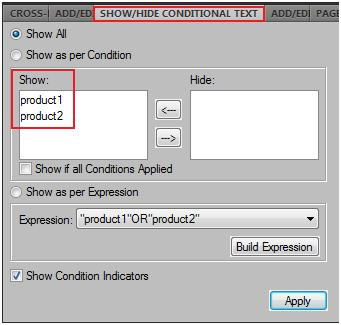
- Click the Show as per condition radio button.
- From the Show: column, select product1, and click the right arrow. This step will move the product1 conditional tag in to the Hide column. The dialog box will appear as follows:
- Click Apply.
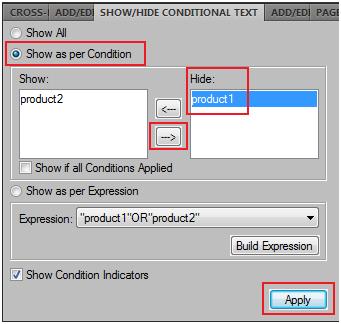
Note: If you receive a message that states that these changes cannot be undone, click OK.
The text for product 1 is hidden, and the document window will appear as follows:
Experiment with conditional text settings; try adding and removing text, spaces, punctuation, and words. Note that when you apply conditional tags to text, it is important to include or exclude spaces, periods, and paragraph symbols to maintain the appropriate formatting whem the text is hidden.
Tip: Before you release a document that contains conditional text, turn off the conditional text formatting so the text appears normal. To turn off conditional text formatting, uncheck the Show Condition Indicators check box in the Show/Hide Condtional Text dialog box, and then click Set. Complete This Unit
Send the FrameMaker document(s) to your instructor at admin@mcmassociates.io?subject=FrameMaker variables and conditional text" target="new">admin@mcmassociates.io (click this link
Return
Return to your bookmarked course main page.
Related Information
Adobe FrameMaker Help Archive. PDF or HTML, 2019 appears to be the most recent edition. 900+ pages.
FrameMaker LinkedIn Group.. Have to request to join.
Adobe FrameMaker. Promo page.
Information developed by Jill Brockmann, Jana Owens, Jacqueline J. Pulido, Thomas A. Moore, and David A. McMurrey. For information, contact admin@mcmassociates.io.