MadCap Flare: Simple Project
In this tutorial, you create a simple project in Flare.
Create a Simple Flare Project
- If you've not already done so, start a new Flare project: click File > New Project > New Project.
If you prefer the Start Page, click New Project. In case it's not displayed, click View > Start Pageto display it.
- Name your project with some identifiable part of your name, for example, davidm_project1 (Flare will add .flprj to the file name), and click Empty then click Finish.
- Take a moment to browse the templates that are available. Choose Empty. Building from the Empty template is the best way to learn Flare. Click Next.
- Read the rather lengthy blurb on HTML5, then click Finish.
- If it is displayed, click the X top-right corner of the Start Page to make it go away.
- If Content Explorer is not displayed, click View > Content Explorer.
- Take a moment to browse the very minimal files that the Empty template creates. Click Resources: these are non-displayed, non-printing functions that we'll work with later.
- Double-click Topic.htm. Click the Text Editor and XML Editor at the bottom of the topic.
- Enter some text over Delete this text.... Change Topic Title.
Do Some Basic Formatting in Your Flare Project
- Add several lines to one of your topics.
- Be sure to click Home to see the standard formatting functions:
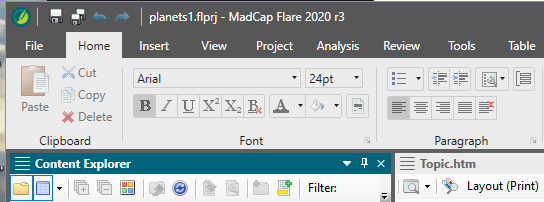
- Select some text, and click B for bold. Click I for italics.
- Select three lines and click the list icon (shown here) and select Numbered List. Notice the other options in the menu.
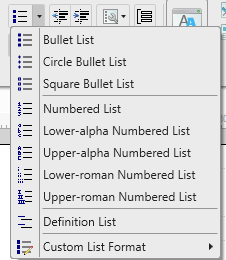
- Format another three lines as a bulleted list.
- Select some text and center it with the Align Center icon. Right-align some other text using the Align Right icon.
- Use the Color icon to turn some text to your favorite color—but not black
 .
.
Build Your Flare Project
In software like Flare, you "build" a project to make it viewable to users. Notice that you have the usual formatting functions in the upper part of the interface.
- To build, click the Project tab.
- Click Build Primary and select Build "HTML5". You can see the progress of the build in the Builds window below. Notice that the Flare project file uses the .flprj extension.
- Click View Primary then View "HTML5" to see what this simple project looks like when built. Not much there. Click the ≡ ("hamburger" icon) top right to display the other panel of the standard HTML5 layout.
Send Your Flare Project
To send the Flare project to your instructor, click Zip Project in Flare and enter your instructor's e-mail address. Your instructor will build your project and check it out.
Return
Return to your bookmarked course main page.
Related Information
Starting Projects: https://help.madcapsoftware.com/flare2019r2/Content/Flare/Introduction/Steps/Start-Project.htm
Getting Started Tutorial: https://help.madcapsoftware.com/flare2019r2/Content/Flare/Tutorials/Getting-Started-Tutorial/Getting-Started-Tutorial.htm
Maintained by admin@mcmassociates.io.